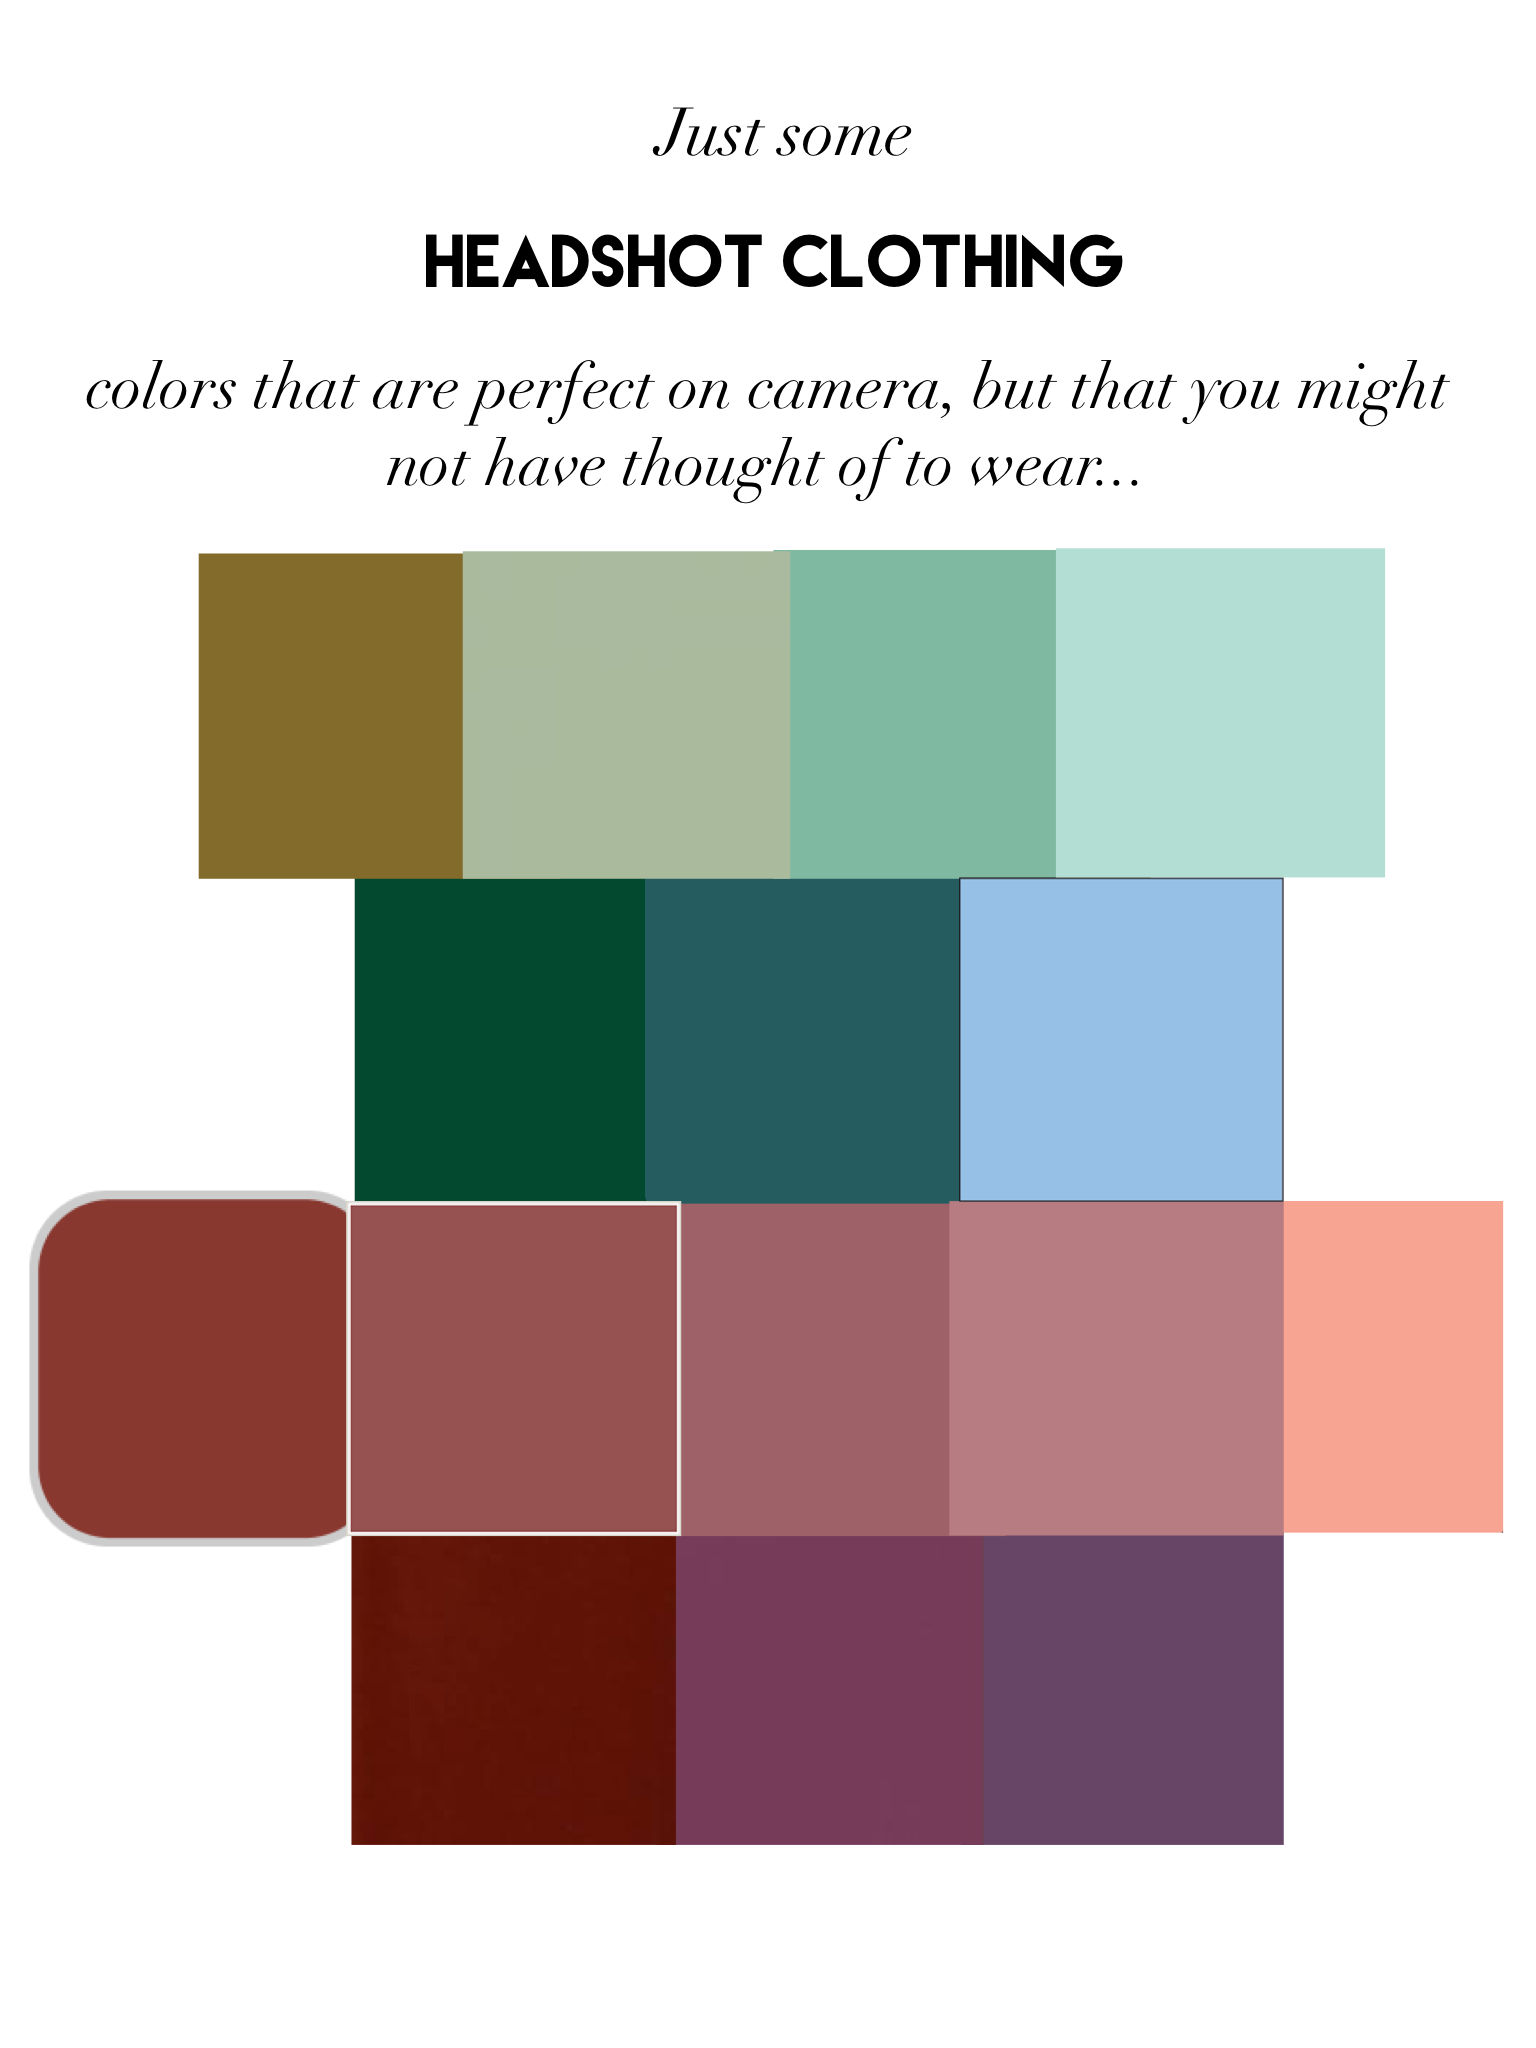
Really tho... What should I wear in my headshot?

To help maximize your session time, we highly recommend planning out your wardrobe BEFORE you arrive!

Bring two to three specific options for each role type you wish to convey. 

*COMMERCIAL IS NOT A ROLE TYPE*  *”JUST ME” IS NOT A ROLE TYPE*

Here’s what doesn’t work:

All black options, all grey options, cowl necks, turtle necks, tube tops, baggy clothing, items with tiny lines or tiny stripes, neons, clothing with stains.

How do I plan for a specific role type but still be versatile? What DOES WORK?

Answer: You see this being achieved on TV all the time! If a role you might play, or a vibe you might give off is friendly, contemporary, grounded, down to earth, maybe funny or relatable, try bringing in a plaid button up shirt!

If the role is upscale, clinical, smart, expensive, educated, direct, you may want to bring in a saturated structured blazer/shirt or dress.

If you know you would be seen for friendly, quirky, weird, down to earth, contemporary, low-key, best friend, maybe this is the SAME wardrobe option as the first mentioned look! (A plaid button up).

Consider what you would wear to your own auditions, does the garment say anything? Does it say what you want specifically a stranger to see in you or think about you?

The rule is, if it works on camera for TV, it works in a headshot.

Never bring in items that you hate on your own body, what is the point?

Pants and skirts are not needed. Just wear something comfy on the bottom when you come in. Preferably with pockets so that you can anchor your hands while shooting.

Read the other article, ‘What to Wear in a Headshot’!

Headshot TIPS!

Your eyes are not too small or “too squinty” when you smile!

Did you know that about 80% + of clients express this concern to me before we start shooting?

Smiling truthfully in your images is more important than worrying about the size of your eyes! How creepy would you look if you tried to leave your eyes wide open while you smiled?

So creepy.

…. you’d look so creepy.

Understanding Image Sizing

Now, I’m not great with technology, but understanding sizing of images is so important to keeping the quality of the images your photographer provides you. 

Digital images are made up of pixels. Think of each pixel as the data that makes your image exist, and look like you. 

Digital images can come in various formats, like a .jpeg, .tiff, .cr2, .dng, .psd., and more. 

Right now, we’ll focus on .jpeg. This is the most common format that your photographer will send you when they return your images.

When an image is taken on a digital camera, it is typically formatted in RAW, which just means that it has a crap ton of information embedded onto the image. The information is so extensive that it’s more than you will need as a client. I’m going to compare images to pizza’s in order to help describe this. 
Imagine the image that your photographer’s camera captures is a huge pizza. I mean, this pizza is MASSIVE. It has more ingredients on it than you wanted when you ordered it. It has the regular stuff, pepperoni, sausage, onions, peppers, cheese, but also, it has mushrooms, olives, anchovies, pineapples, cherries, sprinkles, gumdrops, maple syrup and more. You don’t need nor want all the extra ingredients to eat your pizza and have it still be delicious. So, this is where your photographer will reformat your images to make them easier, and tastier for you to digest (use). 

Before distributing your images, your photographer will reformat the files from RAW into .jpegs. Basically, striping them of useless, (to you), information. Removing the anchovies, cherries, gumdrops and maple syrup. 

The final format you receive will typically be a .jpeg. Your .jpegs may come in various sizes. 300kb, 1mb, 3.2mb, 9mb, etc. Imagine this is the actual size of the pizza you ordered. Did you want a personal pan pizza? a 10 inch pizza? an extra large 14 inch pizza? You may want to use a 300kb image on platforms like Instagram, and the larger images, 3.2mb, or 9mb for printing.

In each image size, or pizza size, you will be able to fit a certain number of ingredients (data), before the pizza (image) becomes so heavy (large) that it can’t support the number of ingredients (data) you are putting on the pizza (image). Meaning, that personal pan pizza can only support the pepperoni, sausage, onions, peppers, cheese, mushrooms, olives, anchovies, pineapples, etc., until it becomes so heavy that it falls apart when you pick it up to eat it. 

It is kind of amazing how many ingredients you can fit onto a large pizza though!
If your images are delivered to you in 9mb, and 3mb, don’t necessarily assume that the 3mb (or 10 inch pizza) is too small to print, or has less ingredients than that extra large pizza you ordered. It likely has a lot of information embedded onto the image, and could probably still be printed poster size or larger! I recently had a client ask me why the retouched images I sent her for printing were 9mb, and the unretouched images I sent her were only 3mb. This is where you’ll need to know pixels per inch, or ppi.
When the retouching on her image was done, it was as if I took that massive RAW pizza we started with, and ADDED more ingredients to it. I added artichokes, broccoli, and arugula, things that didn’t exist in the beginning. I then needed to send that pizza to her in the mail. So, I shrink wrapped it! Then, I needed to send her the RAW pizza that I did not add ingredients to (the unretouched images) in the mail, so I also shrink wrapped that. 
The pizza with more ingredients will shrink wrap smaller than the pizza with less ingredients. So, both pizzas are large, and delicious, but one just has more on it that didn’t exist in the beginning. 
Both images have 300 pixels per inch, the maximum number of pixels that can be fit onto an image. Both images are going to print large and clearly. It’s just that one image has more data than the other because more ingredients were added to it. 

Well, that’s about it. In general, you want to use the smallest sized images for instagram and twitter, the medium sized images for emailing and web usage, and the largest sized images for printing.

If you have any questions about image sizing feel free to ask us in the ‘ask’ box above!

I’m going to go order a pizza now.
Let's Talk Technical!

I am often approached by clients with questions, requests, comments, and concerns regarding the elements of photography that make up their headshots.

For example, once I had a client try to explain that they liked outdoor headshots because of the “background having those bright light, bulby looking things…” How ideal would it have been if they could have said, “I like outdoor headshots because of the beautiful bokeh.”
So let’s dive in, let’s go over some common elements found in photography and their corresponding terms. I’ll make these really easy to understand. That way, you can have an educated conversation with your photographer about what you are seeing in your headshots!

Catch Lights

Do you ever notice those white glowing things in the subjects’ eyes and wonder what they are? Those are CATCH LIGHTS. They are a reflection of the light provided, bounced into the iris of the subjects’ eyes. 
Digital Photography School’s website describes them as “…simply the highlight of a light source reflected off the surface of the eye. This highlight adds depth and dimension to the eye, and gives the eyes life in a portrait or snapshot.”
Without catch lights, the iris and pupil would appear unnaturally lifeless, and can detract from the image. So, in a nutshell, stop asking your photographer’s to “remove those bright white things in my eyes.”
Here’s a link to read more: http://digital-photography-school.com/an-introduction-to-catchlights/

Bokeh

When describing what’s happening behind a subjects’ head and the blurriness of the background, we call this a BOKEH
Bokeh is defined as “the visual quality of the out-of-focus areas of a photographic image, especially as rendered by a particular lens.”
The bokeh on an image could be either soft and buttery, or radial and busy. The bokeh of an image is set by the photographer based on a few things, including the lens that they have chosen to use.
Each lens is different and each photographers’ preference is different. It could actually come across as rude if the client is to ask the photographer to ‘blur out the background more’ on their returned images. Potentially the bokeh they achieved was because they wanted it the particular way they shot it, or, their equipment won’t allow them to get the background any more blurry. The bokeh is also controlled by how far the background is from their subject, the natural light being cast that day (sunny or cloudy), and the aperture of their lens.

Exposure

Sometimes you might want to talk to your photographer about the brightness of your photos. Maybe you might like them brighter or darker. Alternatively, you may want to tell them about how your last headshots feel ‘washed out’, and you’d like your skin texture to have more depth. You are describing the EXPOSURE of your images.
Exposure is the amount of light that is let into your image. If it is very dark in the space you are shooting, you may find that, without additional light, your images are under exposed. If you are outside or in a brightly lit studio, you may find that your images can be over exposed. Some photographers style is to over expose your skin, so less detail is seen. Some photographers choose to under expose you, so that the images are moodier or more skin texture is seen.

These are three of the most common terms I feel you will encounter and need to use when speaking with your photographers. If you have any other elements of an image you wish to know the terms for, send us an email at info@emilylambertphoto.com!

Happy shooting!

Catch Lights can be seen in Justin's eyes!

Catch Lights can be seen in Justin's eyes!

An example of Bokeh can be seen behind Charmaine's head!

An example of Bokeh can be seen behind Charmaine's head!

Three variations on exposure are seen as modeled by Emily, above!

Three variations on exposure are seen as modeled by Emily, above!

What to Wear in a Headshot...

I love actors to work in terms of ‘type’. Don’t be afraid, the word isn’t actually that scary. Ask yourself, what/who can I play, or realistically be called in for, then choose outfits that best fit your types! If your type is bubbly, trendy, girl next door, Zooey Deschanel type, then look at what Zooey Deschanel wears and bring those items in to your session. I.e. flirty, brightly colored dresses that are form fitting but perhaps with a bit of lace/buttons/trimmings etc. If you’re type is edgy, smoldering, bad boy, Channing Tatum type, bring in a fitted tank with a worn leather jacket. 

Picking the right looks should be the easy part. You do have the ability to use google image search, and I would suggest it. 

Now, the tricky part is finding items that look GOOD on camera. 

Let’s talk COLORS:

Tertiary colors are always winners in headshots. Salmon, brick, moss, taupe. jewel tones, or gemstone tones, also look GREAT on camera. Ruby reds instead of bright reds, Amethyst, Emerald, Sapphire… get it? Colors to avoid: Black, and grey! Black, absorbs light and can look flat as a board on camera, not showing your shape. Grey, well, most casting directors say that grey says nothing at all about your personality and is as boring as watching an old woman knit. A good rule of thumb is, if you can’t find it naturally occurring in a fruit or vegetable or MEAT, it’s probably worth staying away from.

FABRICS:

Choose fabrics that have some texture, cotton that is woven with different values, some light, or dark areas. Silk reflects light nicely, so does leather/chiffon/denim. If you MUST use black, then use a black garment made of silk or leather, and these will illuminate areas of the garment that are usually lost in cotton, and add in some shape. Garments that have unique stitching, or are woven are great choices. Texture provides shape, and shape is interesting to look at.

SHAPE:

While we’re on the subject… if your photographer allots you three different looks, why on earth would you bring in three v-neck t-shirts in three different colors? This is your opportunity to showcase all that you are! Get funky, get unique. Sure, bring in the standard v-neck t-shirt or tank top, but then bring a jacket to layer on top, your next two outfits should be completely different. Some agents, managers and CDs LOVE seeing your bare skin, while others HATE it. It’s all subjective. So why not bring in a mixture of items so you have a shot to appease any opinion. The general consensus on this is, make sure what you are wearing FITS and doesn’t drown your physique. No ‘potato sacks’ is what I like to say!

PATTERNS:

I love patterns! However, try to avoid super small patterns, like tight stripes or small polka dots. They will ‘dance’ on camera, also known as moire. (Refer to the dancing lines post made more recently.) Large patterns usually photograph well, but make sure they don’t distract from your face. Ask a friend or colleague for advice if you’re not sure. Some fabrics, like linen, are stitched with tiny tiny stitching in different values that can also give the appearance of a small pattern that will ‘dance’. Best thing to do is give yourself a picture check! Use your camera phone to take a couple pictures of the garment, in different positions. Is it dancing? 

What’s over used?

Glad you asked. Colors that match your eyes, how many eye colors are out there? Brown, blue, green, grey….? That doesn’t leave us many options. Chances are, it’s been done before. I was looking through my proofing gallery the other day, which displays 5 clients at once, showcasing the first image I took from each client. I realized the gallery looked like this: blue, pink, blue, pink, blue. Think blue and pink might be overused? You guessed right! MEN, light blue, button up, collared shirts are the MOST commonly chosen headshot item. WOMEN, cobalt blue, ribbed tank top is the MOST commonly chosen headshot item.

In conclusion… get clever, be unique, be over prepared with choices, and remember, everything is subjective! The best thing you can do is give options! Happy searching! :-)

For more advice regarding colors, patterns, textures, and more, email me or inquire in the ask box.

How to Avoid a Failed Headshot Session

As I wait for Season 6 of The Walking Dead to return tonight with a new episode, I thought about a client I had just the other day, who had many concerns during her headshot session. 

This is a completely normal circumstance to come across, and typically doesn’t bother me too much. 

People will typically have concerns during their session for several reasons… 

A.  They’ve previously had a traumatic, or just plain lame headshot experience.

B. They have unrealistic expectations. Or, they think that photographers are magicians.

C. They don’t love the way they look. I mean, in life. They don’t love the way they look in  life.

D. They have been receiving few auditions or have been out of work and have now put too much pressure on this particular headshot session to change those circumstances.

E. They’re hangry.

Whatever the cause may be, there is usually a trend with how these concerns manifest themselves during a session.

That manifestation always takes the form of a question.

That statement above is extra important to remember, and that is why I’m writing about this subject today. The client I had just the other day had many concerns, and they were all voiced as a question, not a statement.
What do you mean by ‘concerns’, Emily?

I.e.: 
“Do you think my hair needs to be fuller on the top?”
“Do you think the green background is too much green with my shirt?”
“Is that edge lighting too much light on my face?”
“Do you think this lipcolor is too pink for this look?”
“Do my eyebrows look too filled in?”

I’m suspecting that concerns are voiced as a question because when a concern is just a seedling, people are looking for a second opinion. However, when the only other person in that room is your photographer or stylist, you are seeking the second opinion of the people who made the choice that is concerning you to begin with.

It’s important to remember these things: 
Your photographer and/or stylist do not want to do a bad job! They have made every choice consciously, and believe these choices to be in your best interest based on their professional experience. 

Only YOU know YOU! Your photographer and stylist just met you. So when it comes to subjective questions, such as, “Do you think my hair needs to be fuller on top?” “Do you think the green background is too much green with my shirt?” etc., ONLY you can know what you want the ‘correct’ answer to these questions to be.

Be confident in your choices and communicate. If you are thinking you would like more volume on the top of your hair, instead ask, “May I have more height on the top of my hair?” If your hair will look absolutely ridiculous as a result of this choice, then your photographer or stylist will tell you. But ALL we can do is make suggestions. YOU are solely responsible for choosing how you ultimately will look in your images.

The detriment to asking a subjective question to the people who made the particular choice that is concerning you to begin with, is that your answer will always be the same, “I think it looks fine, but would you like something else?”
The subtext to this answer is, ‘I made that choice on purpose… If you do not want it or do not like it, then you need to let me know.’ 

Photographers are not magicians nor are they mind readers, and they are certainly not there to sabotage you. What good would that do for our businesses?

Take control of your choices. Be responsible. Don’t be hesitant. Say what you want as a request, not as a question.

Obviously, be polite, be kind, and communicate.

These actions will generate the best possible results.

Now go out there and have a fabulous, fun, and successful headshot session! Go you.